A banner from a portrait shot
The photo you have is vertical and the header slot is 16:9. Cropping loses the subject; extending does not.
Upload a photo, pick the shape you need it to be, and AI paints in the area that was never photographed. The expansion always goes outward, so nothing is cut off.
Follow us and get 20 free credits — about 2 images
Expanding re-renders the whole frame, so keep your original file.

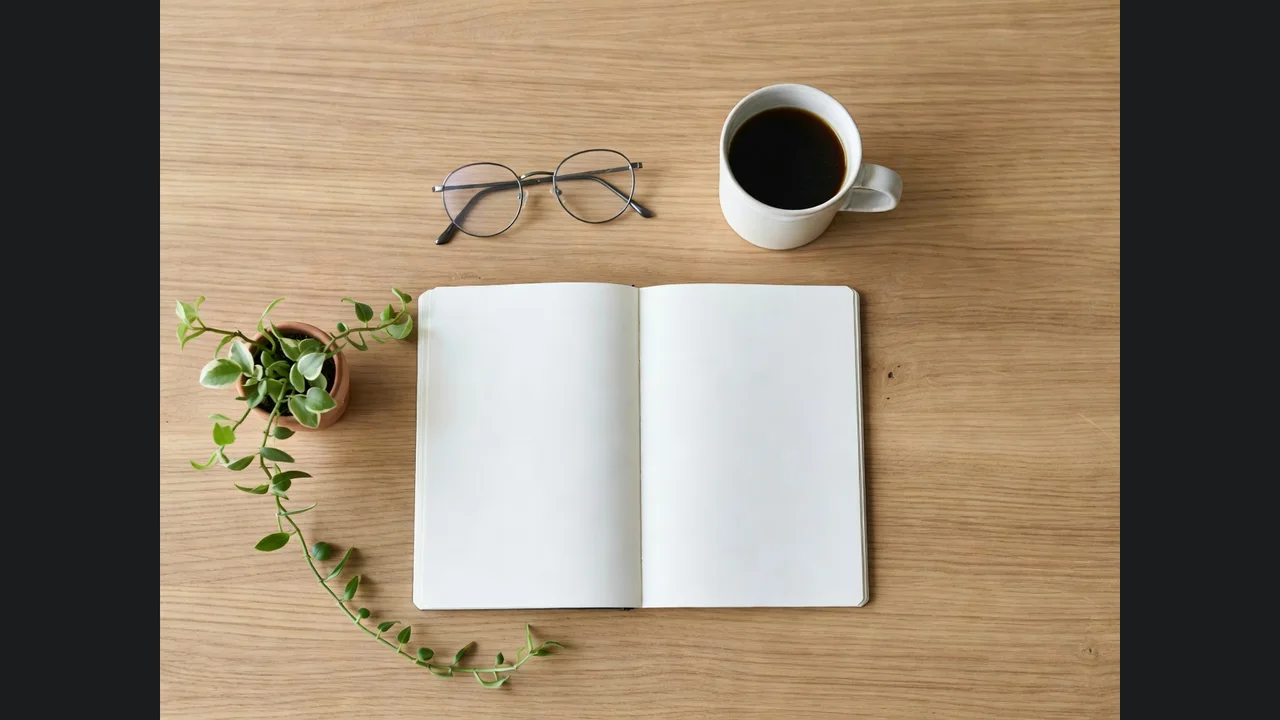
Our own run — the grey areas are what the model filled in.
Subscribe for more credits and more models.
Upload the photo, choose the shape you need — 16:9, 9:16, square, 4:3 or 3:4 — and generate. The image is placed in the new frame at its original size and AI paints in the area around it, matching the surfaces, light and perspective already in the picture. Nothing is cropped: one edge keeps its size and the other grows. It takes about a minute. Following us on X and YouTube earns 20 free credits and a run here costs eight, so your first two expansions are free.
Want more pixels rather than more picture? Use the image upscaler instead
Almost always the same underlying problem: right photo, wrong shape.
The photo you have is vertical and the header slot is 16:9. Cropping loses the subject; extending does not.
Going the other way — a wide photo that needs to be 9:16 without the sides being chopped off.
A product shot with no empty space to put a headline in. Extending makes the space instead of shrinking the product.
An old photo where someone’s feet or the top of a building were cut off in the original framing.
The shape you pick is the whole control — there is nothing to drag.
Any JPG, PNG or WebP. Photos with continuous surfaces — sky, walls, floors, road, water — give the model the most to work with.
The image keeps one dimension and grows on the other. It is never cropped, so a 4:3 going to 16:9 grows sideways only.
About a minute. Check the seam where old meets new at full size, then download or try a different shape.
From our own runs. The rule of thumb: the model extends surfaces confidently and structures nervously.
| What is at the edge of your photo | Expected result | What to do |
|---|---|---|
| Continuous surface — desk, wall, sky, water, road | Best case — the surface simply continues and the seam is invisible | Nothing needed |
| Architecture with strong perspective lines | Good — in our test a shopfront gained a roof, dormer windows and a full cobbled street | Extend generously; small extensions give it less to reason from |
| A subject cut off at the edge (half a person, half a car) | Mixed — it will complete them, and the completion is invented | Check anatomy and proportions carefully before using it |
| Repeating fine pattern — tile, brick, fabric weave | Usually convincing, occasionally drifts out of alignment near the seam | Compare at 100% before printing |
| Text or a logo near the edge | The model may extend it into invented lettering | Say "do not add text" in the box — the default prompt already does |
| A very large expansion, e.g. 3:2 all the way to 9:16 | Works, but most of the result is now invented rather than photographed | Fine for backgrounds; think twice for documentary use |
Both from this page’s own model and settings on 2026-08-25.
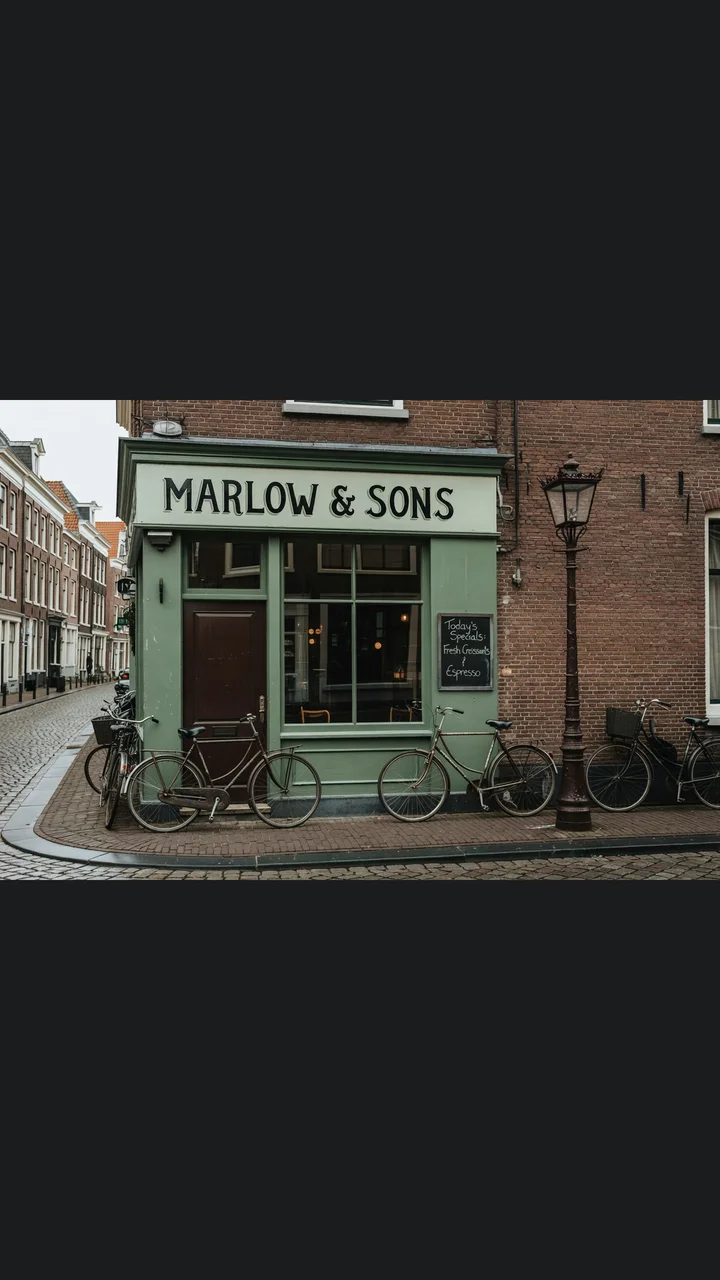
The grey area is empty canvas — this is literally what gets sent to the model.
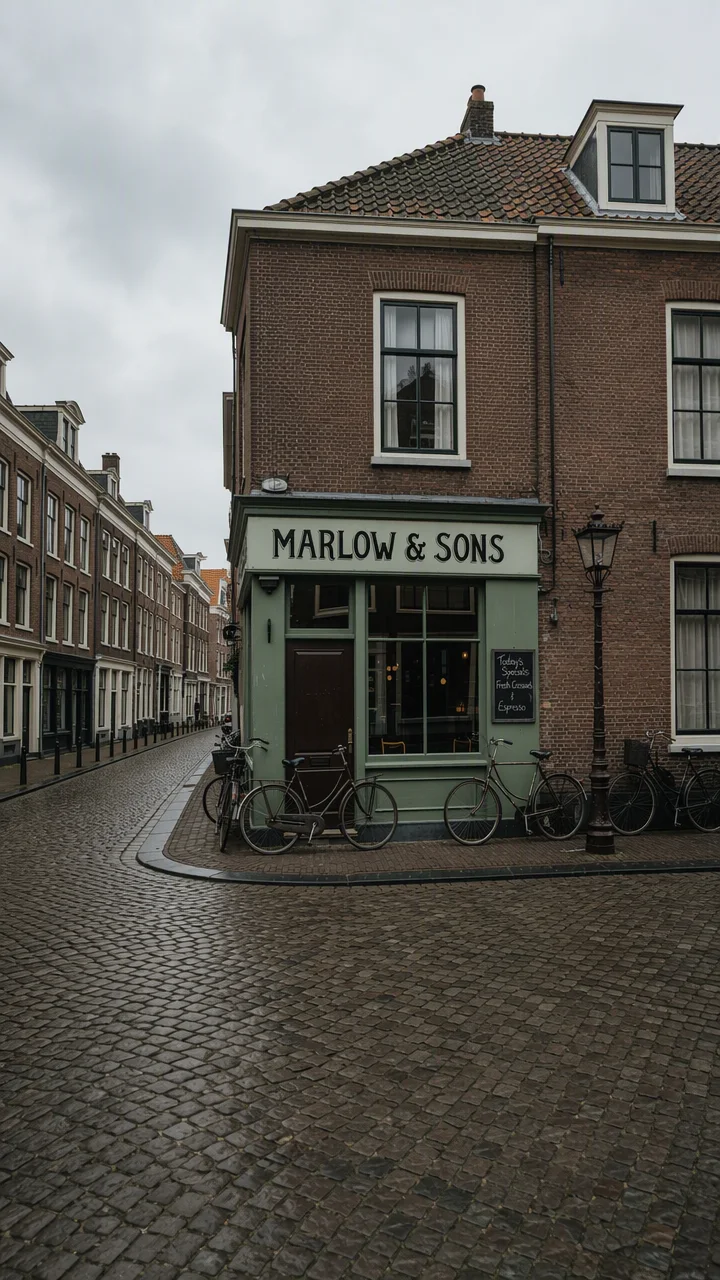
It invented the upper storey, the dormer windows and the cobbles — and kept the shop sign legible.
The narrower case — a modest sideways extension over a continuous surface.
Wood grain carried across the seam. This is the case the tool is most reliable on.
These two get confused constantly, and picking the wrong one wastes credits, so it is worth one paragraph. Upscaling adds PIXELS: the same picture, same framing, same content, rendered at a higher resolution so it survives being printed or viewed large. Extending adds PICTURE: the resolution stays in the same league, but there is now more scene than the camera ever recorded. If your image is too small, upscale it — that is a flat one-credit pass on a different page. If your image is the wrong shape, extend it here. Doing the second when you needed the first is the most common mistake in this category.
How it works underneath matters too, because it explains the page’s one real caveat. Your photo is not sent to the model as a photo. The browser builds a canvas at the shape you picked, drops your image into the middle of it, and builds a second black-and-transparent image that tells the model which pixels to keep and which to invent. Those two go up together, and the model paints into the transparent area using everything it can see in the kept part — the light direction, the surfaces, the perspective, the colour of the day.
The caveat is that the model returns a NEW rendering of the whole frame, not your original with a border glued on. In practice the kept area comes back looking like itself, but it is not pixel-for-pixel identical — fine detail can shift very slightly. This is inherent to how the outpaint pipeline works, including in the main Renoise editor, so keep your original file rather than treating the extended version as a replacement. For the same reason, the output resolution follows the model’s own tier rather than your canvas: in our tests a 1536×864 composite came back as 1280×720.
One last practical note, and it is a slightly counter-intuitive one: be generous with the extension. A tiny expansion gives the model a thin strip to reason about and it can produce mushy filler; a large one gives it room to construct something coherent. Our most convincing result was also the most ambitious — a 3:2 street photo pushed all the way to 9:16, where it built an entire upper storey and a cobbled street that were never in the frame.
Most tools on this site give you five or six free runs, and one gives twenty. This one gives two, and rather than bury that we will say why.
Outpainting needs a model that accepts a mask — an instruction saying "keep exactly these pixels, invent everything else". We tested the cheaper options before settling. Nano Banana 2 Lite, which powers several other tools here at four credits a run, rejects a mask outright. Nano Banana 2 accepted the request and returned something worse than a failure: our original image letterboxed onto white, with the furniture quietly restyled — it had ignored the mask and simply run a normal image-to-image pass. A tool that looks like it worked and did not is the one genuinely bad outcome.
So this page runs GPT Image 2, which does honour the mask, and which costs eight credits a run. Twenty free credits divided by eight is two. We would rather give you two runs of something that actually extends your photo than six runs of something that pads it with white and calls it done.
That also shapes how to use the free ones. Pick the shape you actually need rather than experimenting, keep the default instruction unless something specific needs saying, and use a photo with a continuous surface at the edge if you have a choice — those three things get you the most out of two attempts.
What happens to a file you upload here:
Picking a file only previews it on your device. Not one byte is stored until you sign in and click generate.
Uploads land in your private library, never a public gallery, and re-running the same photo stores nothing new.
Remove uploads and results from your library whenever you want.
Credits work across every tool — upscaling, image editing and the video models.
For first-time AI content creators
Billed $168 annually
Upgrade PlanSave $72/year
For creators shipping content every week.
Billed $504 annually
Upgrade PlanSave $216/year
For studios and pros producing at commercial scale.
Billed $1680 annually
Upgrade PlanSave $720/year
For first-time AI content creators
Billed monthly
Upgrade PlanFor creators shipping content every week.
Billed monthly
Upgrade PlanFor studios and pros producing at commercial scale.
Billed monthly
Upgrade PlanRenews automatically each year until canceled.
Renews automatically each month until canceled.
Extending changes the shape. Upscaling changes the resolution. They are different passes and different prices.
Upload it to the tool at the top of this page, pick the shape you want — 16:9, 9:16, square, 4:3 or 3:4 — and generate. Your photo is placed in the new frame at its original size and the model paints in the surrounding area, matching the light, surfaces and perspective it can already see. It takes about a minute.
No. The expansion is always outward: one dimension keeps the source’s own pixel size and the other grows to reach the shape you picked. A 4:3 photo going to 16:9 grows sideways and keeps its full height. Nothing is ever cut off — that is the whole point of an uncrop tool.
Following us on X and YouTube earns 20 free credits and a run here costs eight, so your first two expansions are free. That is fewer than most tools on this site because outpainting needs a model that accepts a mask, and the cheaper models here either refuse one or ignore it — we explain the testing above rather than quietly serving you a worse tool.
Upscaling adds pixels — the same picture at a higher resolution. Extending adds picture — more scene than the camera recorded, at a similar resolution. If your image is too small, use the upscaler, which is a flat one-credit pass. If your image is the wrong shape, use this page.
Visually it comes back looking like itself, but not pixel-for-pixel: the model returns a new rendering of the whole frame rather than your original with a border added. Fine detail can shift slightly. Keep your original file and treat the extended version as a new asset rather than a replacement.
The model’s own tier, not the size of the frame we compose. In our tests a 1536×864 composite came back as 1280×720 and a 1152×2048 one came back as 720×1280. If you need it larger, run the result through the image upscaler afterwards.
The control is the target shape rather than a drag handle, which covers the job this tool is for — making a photo a different shape. Counter-intuitively, generous extensions tend to look better than tiny ones: a thin strip gives the model very little to reason from, while a large area lets it build something coherent.